Before I begin, I want to take a second to acknowledge that throughout my journey of using cups, I have always had the luxury of choice. I have tried every standard sanitary item option and the key point here is that I’ve always been financially able to make this decision freely. My cultural and religious affiliations also do not have an effect on my decision and I have made that decision based on what I’ve found works for me. For many women (including students) throughout New Zealand, this isn’t such simple choice nor a readily available option – there are women who, for many reasons, are unable to access any sanitary items. When you add the knowledge that sanitary items which require vaginal insertion are not an option for some women (there are numerous reasons for this), it really highlights that period poverty is an incredibly a diverse and complex issue.
I’m incredibly lucky to have the luxury of choice, and access to a product that I believe best suits me personally.
In support of
the cup.

It took me until early 2018 to really commit to trying a cup. For years I heard murmurs of menstrual cups and how life-changing they could be. Despite the reviews, I didn’t care to learn about what it was exactly that so many women loved about them.
Why?
Honestly, I was grossed out. The idea of trying something different was daunting and brought about so many questions. How do you use it? How do you remove it? Is it safe to use with an IUD or another intrauterine device (by the way, the answer to this one is: yes, definitely – I’m happy to answer questions about this)? How do you clean it? And, God forbid, what if the cup overflows or you spill it during removal?
It seemed like too much maintenance.
Then, some time ago, two of my closest friends made the leap and bought cups. Their reviews were my first stepping stone. They raved about them! We’re all surfers, runners, yogis, climbers and generally highly active women, and the discomfort of cotton sanitary items was not lost on us. Anyone who has tried strenuous activity while using a tampon on a lighter day will know the kind discomfort I refer to, but we so often felt like we just didn’t have another option.
Won over by the reviews of my friends, and the cup’s status as an eco-friendly option (think of all the disposible options that go into landfill!), I bought my first cup about two months later.
While it wasn’t necessarily the smoothest start, my review remains 100 percent positive. I did my research on different folds and read up on how to remove the cup but during my first try, I found the removal process was not as simple as I’d anticipated. Several months later and I like to think of myself as a bit of a pro – practice makes perfect!
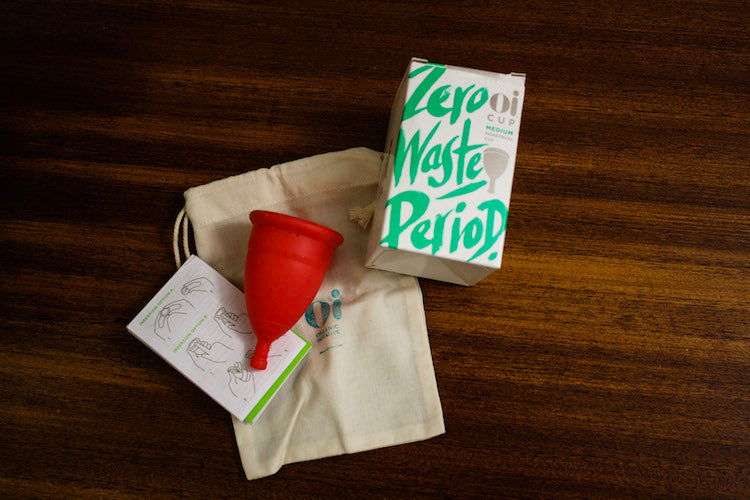
When I joined the team at Dignity, I excitedly agreed to try out a cup supplied by our sanitary product stockist and partner, OI, and write about that experience. My cup from OI arrived quickly and I immediately noticed some details which I felt made these perfect for beginners.
My initial points:
The eco-friendly bio-medical grade silicone is soft and malleable, making the cup very easy to fold and insert.
The reddish-pink colour of the silicon is ideal for the more squeamish of us, as some cup colours and designs can make dealing with the contents quite a vivid experience.
The stem has a slightly pronounced end which makes it noticeably easier to grasp during removal than other cups I’ve tried, (make sure to read up on my removal tips before you go tugging on the stem, though!)
My cup, a medium, fits perfectly. This is the size suggested for women in their twenties who have not had their first child. As for flow, it’s all about knowing your body and getting used to it. When first using the cup, I emptied it a couple of times per day to get an idea of how often I would need to do this in future.
Most of all, I love that I can do all of my sports and gym sessions and never once notice that I’m using a sanitary product.

So how do they work?
Once inserted, the cup unfolds (sometimes this can take a little rotating or moving the cup) and creates a seal. The cup then sits a little higher than a tampon and collects, rather than absorbs. This means that when removing the cup you have to be careful not to spill the contents, but it’s really not as hard as it sounds.
What about leaks?
While leakage may be an issue for some, it hasn’t been the case for me. I have heard it recommended that on heavier days, one could opt for a light liner to accompany their cup if they’re worried about leakage or not having easy access to a suitable bathroom. Leakage usually happens when the cup doesn’t correctly unfold during insertion, resulting in an incomplete seal. One way to make sure you’re out of leak danger is by running a finger around the cup itself (not just the stem) once it’s inserted and making sure there are no folds or dents.
How do you insert a cup?
Your OI Cup will come with a small pamphlet of directions (you can see this in the second photo of this blog) and I 100% recommend reading the entire sheet before use. There are SO MANY helpful tips in this piece of info.
A quick step-by-step:
Quick note: If you’ve just unboxed your cup, make sure to boil it first. Keep reading for my tips on cup-boiling.
Always wash your hands thoroughly with soap and hot water, but once they’re fully clean it can actually be easier if you don’t fully dry them.
Run your cup under water, this helps with insertion. It’s not vital to the process but is certainly the best way to get started.
Fold the Oi Cup tightly into your preferred fold.
Insert the cup, rim first, like you would a tampon without an applicator (consider the stem the string). It should sit a little higher than a tampon seems to, and the stem should not extend out like a tampon string.
Once the cup is in, rotate it. This helps it spring open and create the airtight seal that I mentioned, avoiding leaks.
For a descriptive list of folds check out this helpful post by Menstrual Cup Australia. The following video, produced my Lunette Cups, is also very helpful and is the first video I watched when starting out.
What about removing the cup?
I was very nervous about this part of the process when I got my first cup, but practice makes perfect. Check out this great info set by MyCupNZ about removing cups. The key things to remember is that the stem is not a tampon string, don’t just pull on that, and remember to relax!
Remember, always wash your hands thoroughly.
Just like removing a tampon, get into a comfortable position. Some find a low squat easiest to start, others prefer being seated on a toilet. Find what works best for you.
When you’ve found the stem of your cup, don’t be tempted to pull. Instead, push your cup down with your muscles. The best tip I had for this was when my friend said “pretend you’re having a baby! If someone told you to push, imagine which muscles you’d use” – you get the idea. You can lightly pull on the stem and wiggle the cup if you that’s all you can reach, but don’t try and force it.
Once your cup is low enough for you to pinch the base of it, squeeze it just enough to break the seal.
Carefully and slowly wiggle the cup out. Best to sit over a toilet for the last part of this to avoid any accidents.
If you need to re-insert your cup, empty it and wipe it with some toilet paper. If you have access to a sink, give it a quick wash but it’s also fine to reinsert the cup once it’s been wiped clean, many of us (myself included) just prefer to give it a wee rinse.
MyCupNZ also gives a great example of what to do if your cup is stuck. It can happen and has even happened to me – once again, the trick is not to panic!
What does it mean to boil your cup and how do I do it?
I have an old mug that lost its handle in a dishwashing disaster. I’ve now reserved this mug as my ‘cup cleaning mug’. It lives in a distant corner of my bathroom with a ‘do not use’ sticker attached. This is because sanitising your cup is a vital part of the process, but I was a bit worried about the mug being used for anything else.
To clean my cup, I boil the jug with enough water for TWO mugs to be filled. I fill the mug with boiling water and let it sit for a minute or two, to make sure it’s sterile. Then I empty the mug, pop my rinsed cup into the mug (rim-up) and pour more boiling water over the cup until it’s covered. I then let it sit for around 3-5 minutes (why not boil the jug for three mugs and make a hot drink to help kill the wait-time?). My newly cleaned cup is then popped in the little canvas bag it came with for when I need it next. The mug is cleaned and sent back to its hiding place. Sometimes I’ll also add just a small drop of organic apple cider vinegar to the boiling water with my cup.


Leave a comment
This site is protected by hCaptcha and the hCaptcha Privacy Policy and Terms of Service apply.